Small bedrooms can be such a challenge.
Would you like some tips for your small master bedroom?

So many of us have small bedrooms these days. If you’re living in an apartment or unit, you can certainly relate to feeling the squeeze when it comes to the best bedroom layout for your space. In reality you may only have one or two layout options that would work for your space – so you want to know you’ve picked the right one!
If you’ve stumbled upon this blog it’s actually one entry in a bigger story that is the journey of designing an Airbnb for my sister and brother-in-law. The challenges to make this happen were time, budget and space.
And how did it turn out? Beautifully!
It’s a testament to the fact that these common realities don’t have to limit a wonderfully functional and stylish space! (if you’d like to see the reveal of the open plan living area you can do that by scrolling through the blog titles at the bottom of this post).
But let’s keep on track because today we’re focusing on all things bedrooms - and more to the point designing small master bedrooms on a budget, that can indeed include everything you need without feeling squishy.
THE BEFORE PHOTOS.

One of the before photos of the main bedroom before its transformation.
Here’s a look at the before photos of the master bedroom of the unit. As you can see it was perfect for just my sister in law, but the floorplan needed more tweaking if it was going to work best for rental guests.

A few other angles of the same bedroom that needed a redesign ready for Airbnb guests.
Here’s the master with its former furniture, all of which had to be replaced with robust and budget friendly options. The above photo also shows how space was truly limited – we had to make every centimetre count!
LAYOUT IDEAS.
Here’s a look at the layout I thought would work best. The important thing was to maintain a floorplan that allowed the master to feel spacious, whilst adding elements to create a comfortable, sophisticated space to retreat to.
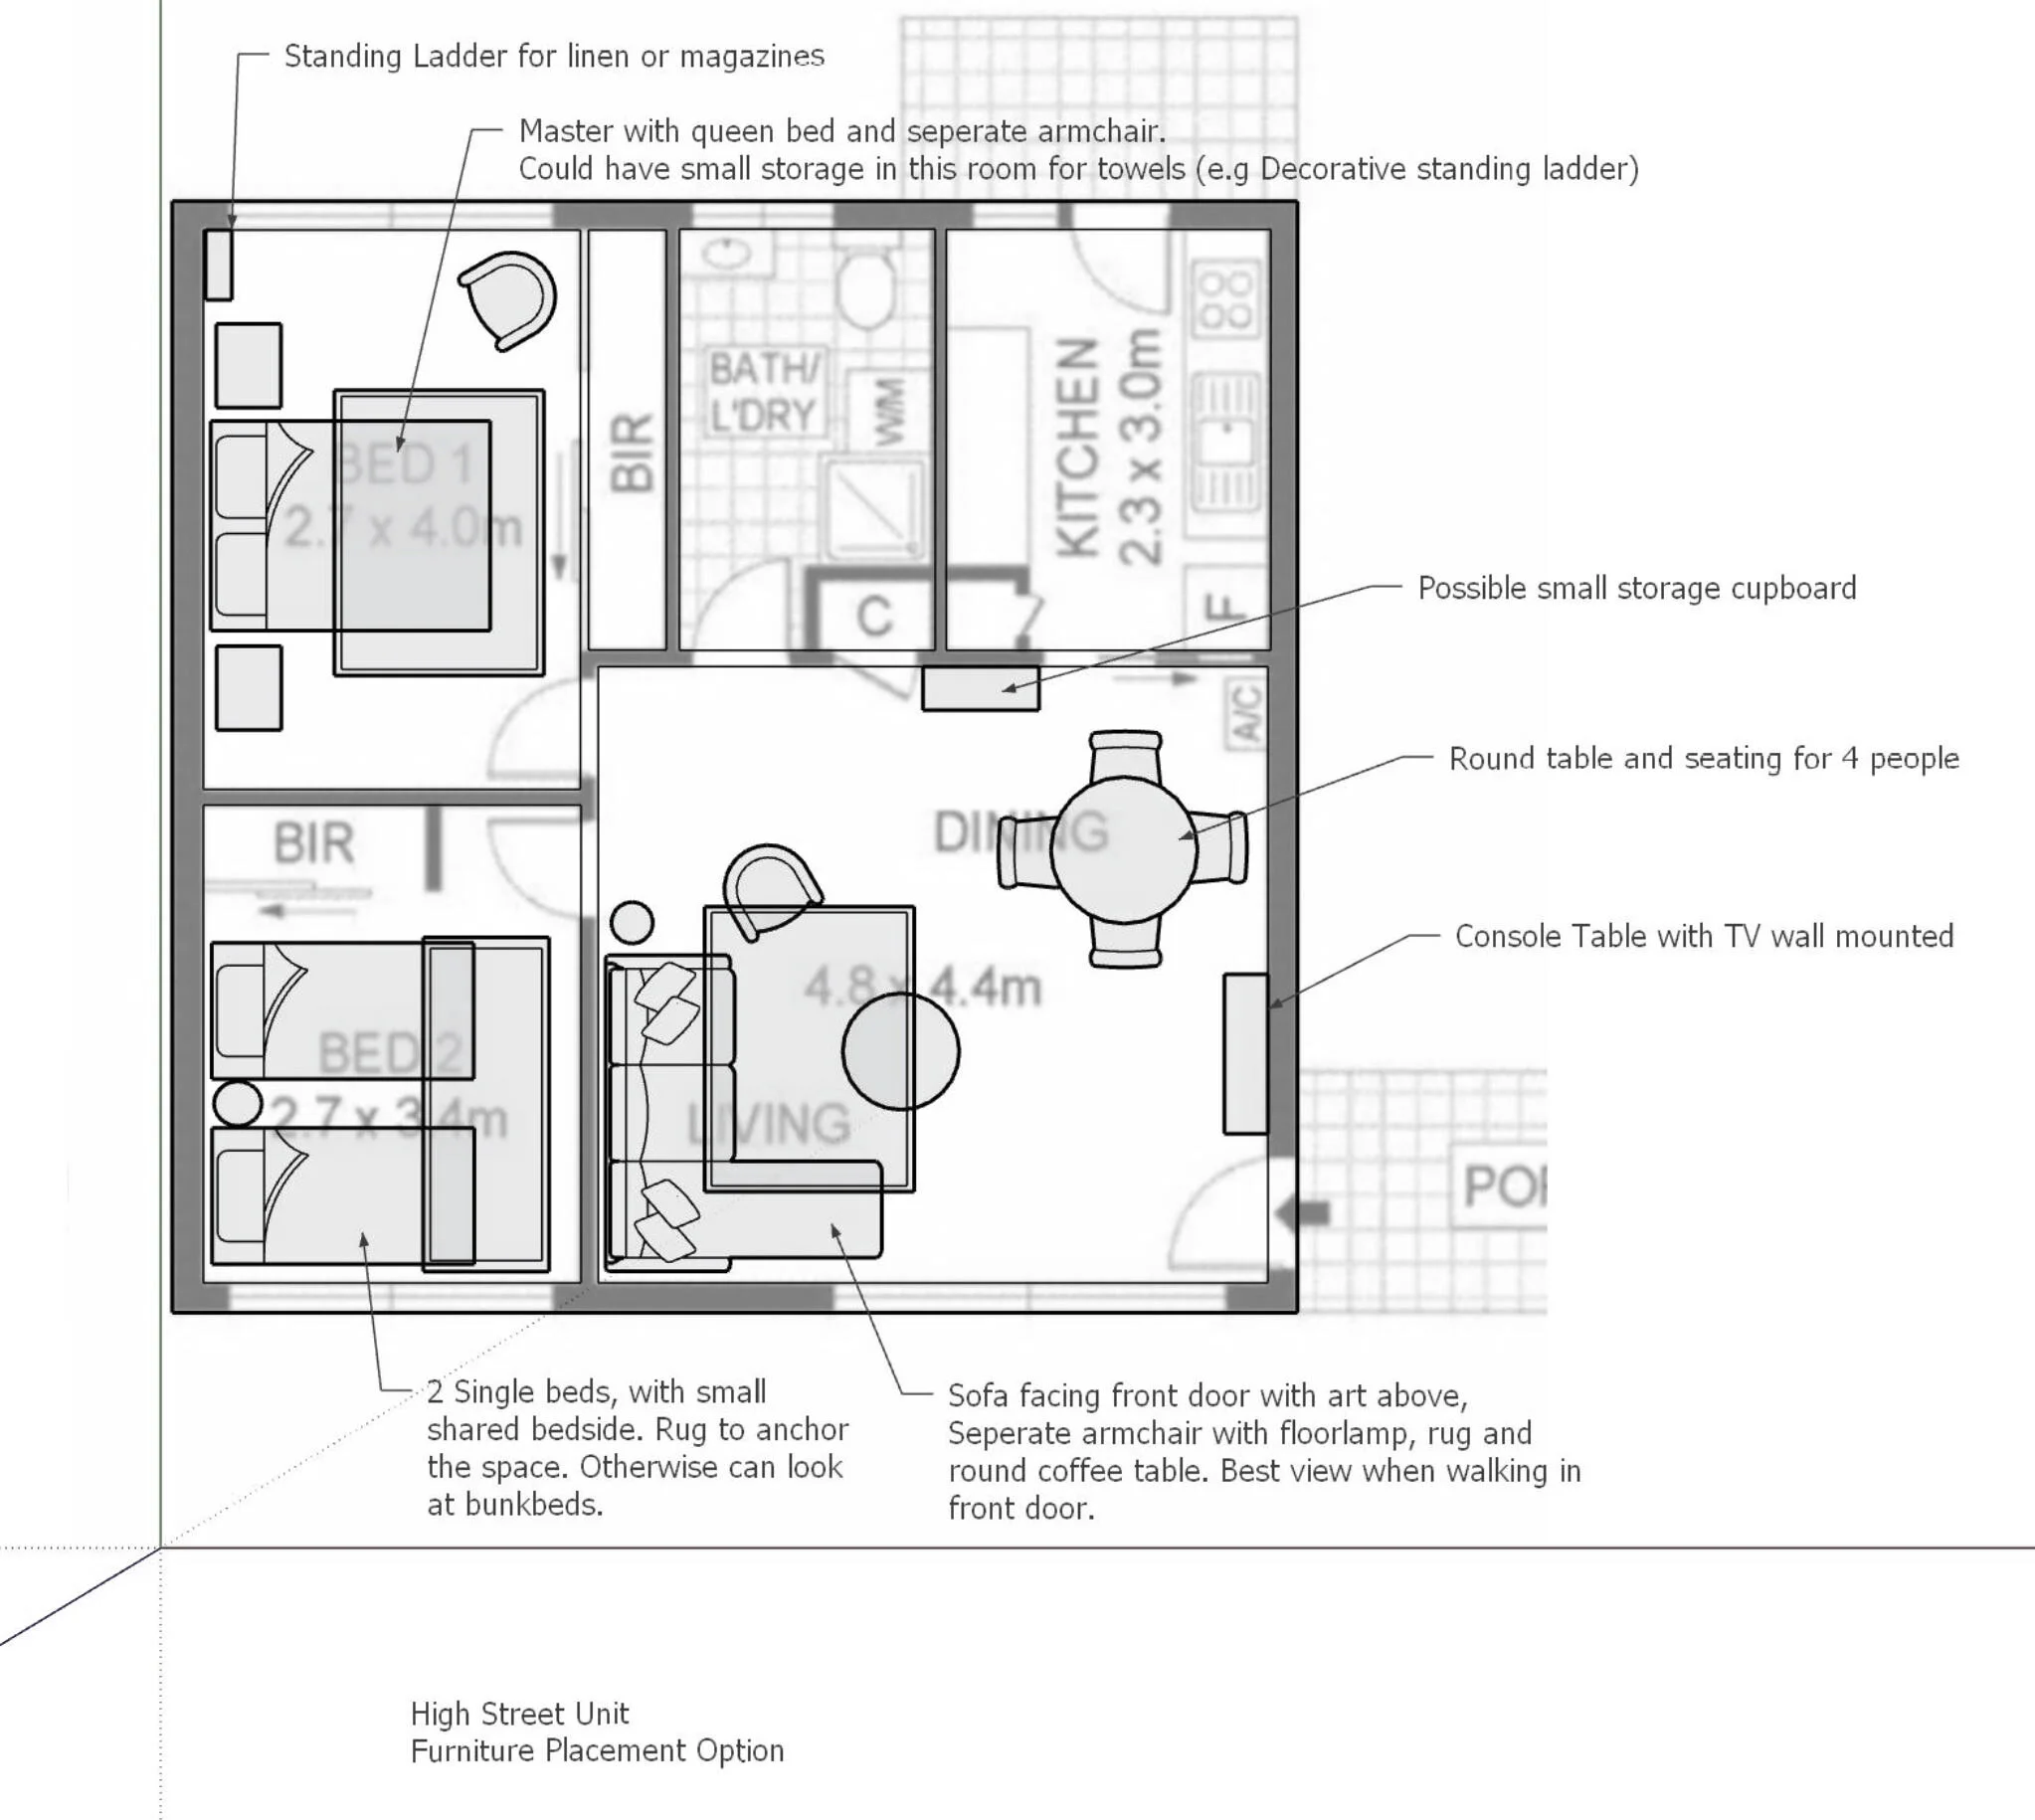
Here’s the floorplan for the whole unit with the master bedroom up in the top left.
Looking at the suggested floorplan drawing, the design was to incorporate a separate seating area within the master to allow guests the option of taking in the views whilst enjoying a coffee; separate from the open plan living. Having options of numerous living zones when staying at a rental property provides flexibility and an added layer of comfort.
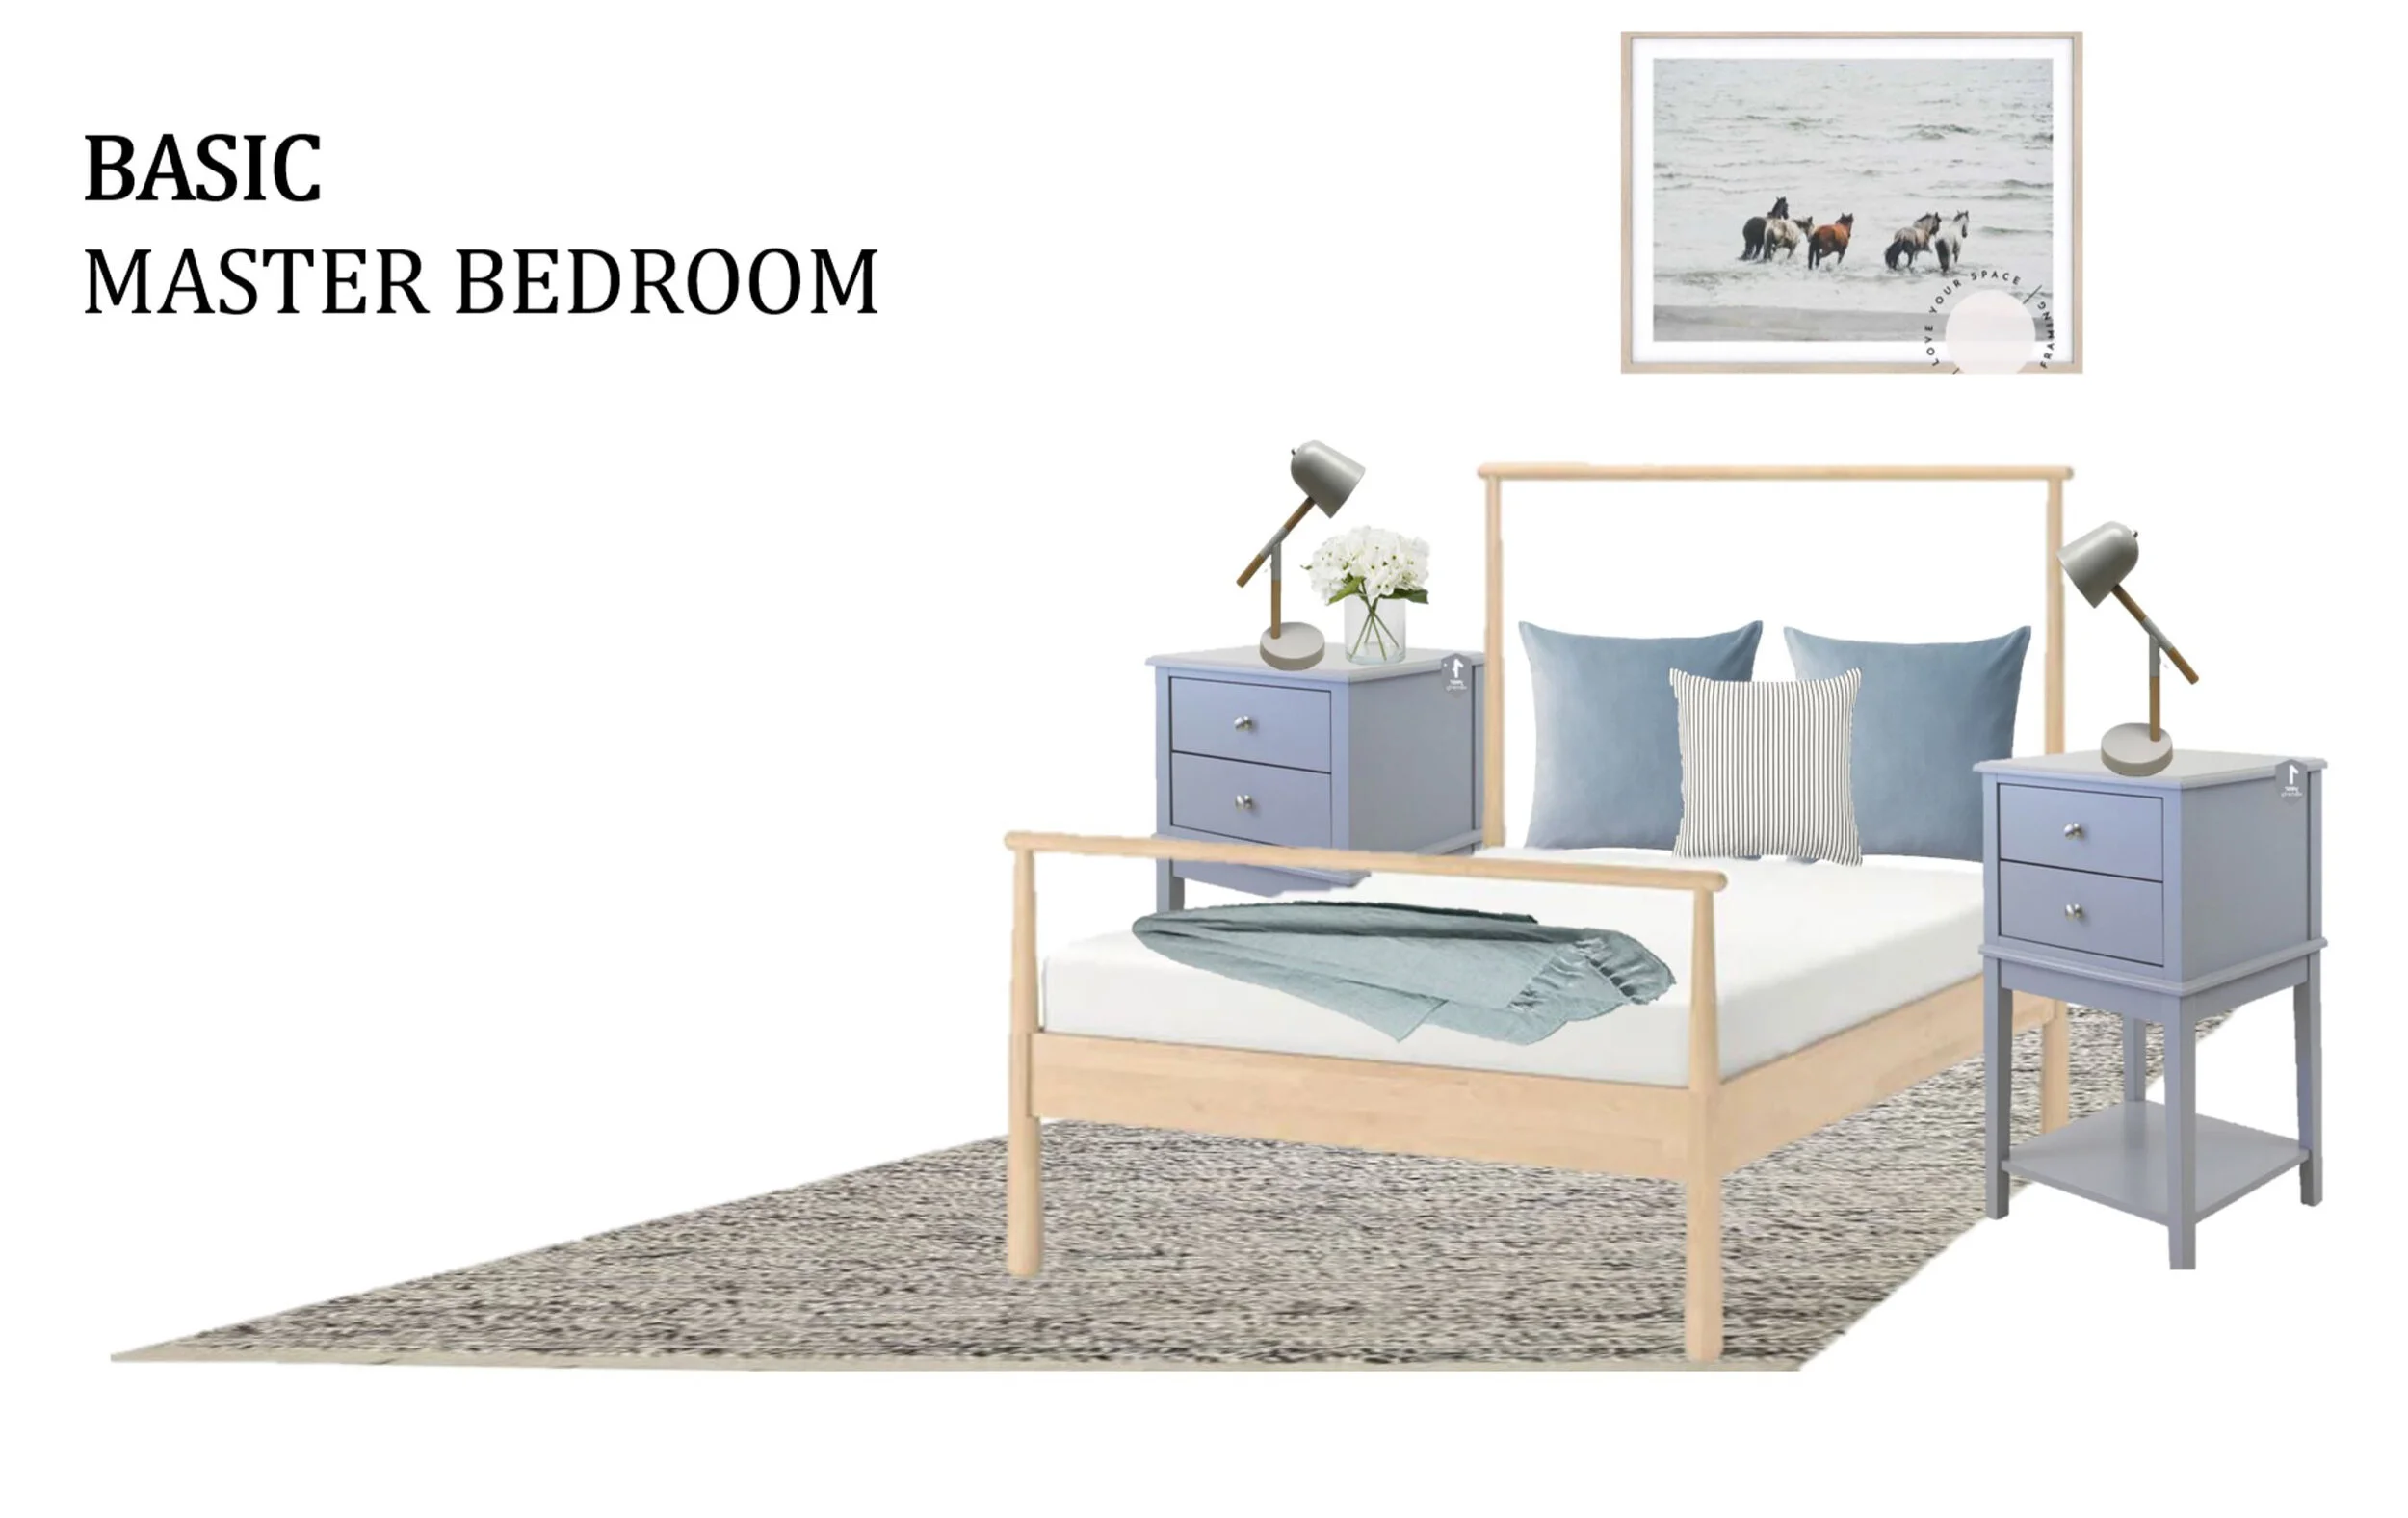
3D DESIGN DRAWINGS.
Here’s the 3D drawings that helped to visualise how the master bedroom would materialise. These initial concept design drawings showed my vision to create a master bedroom with a statement bed (the hero piece in the room), along with a functional seating zone that takes in the views.

The beauty of the 3D drawings is that I could show how the actual art pieces I had chosen would work in the space, along with the colours of the rug. And let’s not forget the actual dimensions of the seating zone, to make sure it acutally fits before ordering anything too big!

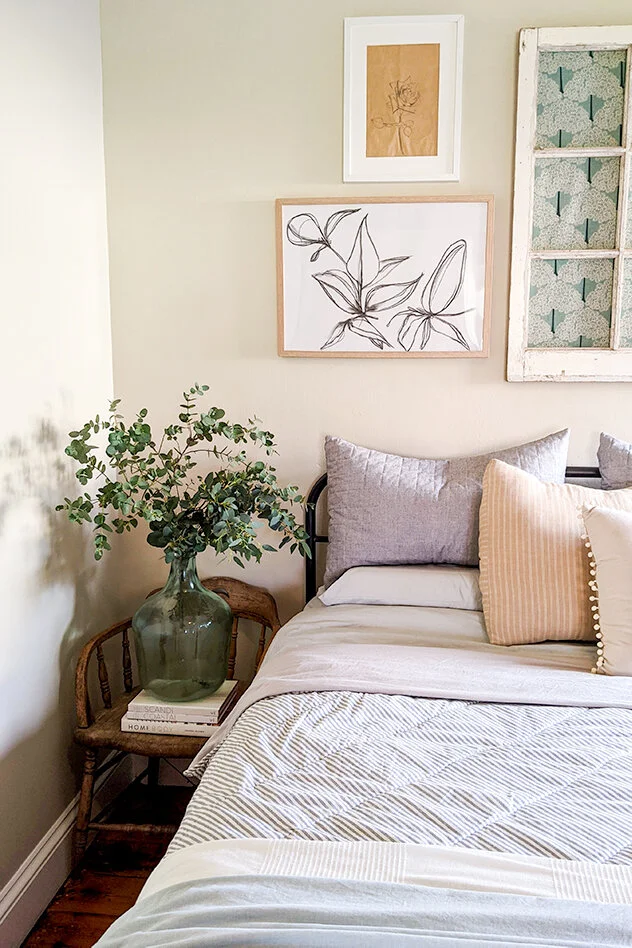
SNEAK PEAK OF THE AFTER LOOK.
Here was the plan for how the space could look. Aesthetically it was all about colours and textures that evoked a feeling of the coast. I wanted to incorporate different textures of leather, rattan, timber and soft cottons to create an authentic holiday vibe, along with artwork that referenced the ocean to help guests be immersed in their seaside location.
In my next blog post I will reveal all the AFTER PHOTOS of what became a cocooning and restful coastal retreat. It was a master bedroom makeover on a budget, but with deliberate design choices and layout considerations it didn’t come up lacking. This project helped cement for me that you don’t need a huge master suite, as long as it highly functional and thoughtfully designed for the people who will call it home (even a home away from home). I’m sure many guests will have have happy holidays in this lovely space!
TIPS FOR YOUR SPACE.
What about your master bedroom? I’ve got a few tips for you if you’re working with a small space…
Keep your colour palette restrained.
Choose 3-4 colours and stick with them. Too many colours can make a small space seems even smaller due to the fact that your eye is so busy trying to take everything in!
2. Measure out all your furniture pieces before buying.
The common mistake is buying a new bed that you’ve fallen in love with, before measuring the room and all the other pieces you might want to include (think bedside tables, rugs, extra seating, end of bed bench etc). Measure and tape out all furniture dimensions first - you’re after a spacious and functional space after all.
3. Stick to a ‘look’.
Land on a style or look that most resonates with you, and stick to it. This continuity will help your space feel calming, cohesive and as spacious as it can. Carry your look through all your soft furnishings to look like a pro!
Perhaps this blog has inspired you to transform one of your own spaces. Would you like help with your master bedroom layout or furniture choices? Whether for an Airbnb endevour or your own home, I can help take out the guess work on budget, style and save you pesky mistakes that you just don’t know about until you make them!
Contact me at bec@designrelease.com.au - I’d love to help you in your room transformation.


Want to transform your home into a cosy, warm space this winter? Read all my tips on how to do just that….